Every professional software team in the world uses version control. And the most widely used version control system today is Git.
Whether you are a developer writing application code, a DevOps engineer managing infrastructure as code, or a cloud engineer working on deployment scripts — Git is the tool you will use every single day.
What is Git?
Git is a distributed version control system that tracks changes in your files over time.
Version control means Git keeps a full history of every change ever made to your code. You can see what changed, who changed it, when they changed it, and why — if they wrote a good commit message.
Distributed means every person working on the project has a complete copy of the entire project history on their own machine. You do not need a constant internet connection to work. You can commit, branch, and review history entirely offline.
Why Git matters for DevOps
In DevOps, Git is not just for application code. You will use it to version:
1. Application source code
2. Infrastructure as Code files (Terraform, CloudFormation)
3. CI/CD pipeline configuration files
4. Dockerfiles and Kubernetes manifests
5. Scripts and automation tools
Everything that can change over time should be in Git. This gives you a full audit trail, the ability to roll back, and a single source of truth for your entire system.
Core Concepts Before the Commands
Before we get into commands, you need to understand four key concepts. These will make every command make sense.
1. The Repository: A repository or repo is the container for your entire project. It holds all your files and the complete history of every change ever made to them.
There are two types:
Local repository — lives on your own machine.
Remote repository — lives on a server, such as GitHub, GitLab, or AWS CodeCommit. This is the shared version that your whole team works from.
2. The Three Areas of Git: This is one of the most important things to understand about Git. When you are working locally, your files exist in one of three areas:
Working Directory → Staging Area → Local Repository
(you edit) (you prepare) (you save)
Working Directory: This is where you actually edit your files — the folder on your computer where your project lives. When you modify a file, the change exists only here, in an unsaved state as far as Git is concerned.
Staging Area (Index): This is a preparation zone. Before you save changes to Git's history, you choose which changes to include by adding them to the staging area. This lets you be selective — you might have changed five files but only want to save three of them in this particular snapshot.
Local Repository: When you commit, Git takes everything in the staging area and saves it permanently into the repository's history. This is your local, permanent record of changes.
3. Commits: A commit is a snapshot of your project at a specific point in time. Every commit has:
A unique ID — called a SHA or hash — a long string like a3f9c21.
A commit message describing what changed and why.
A reference to the previous commit — this is how Git builds a history.
Think of commits like save points in a video game. You can always go back to any save point if something goes wrong.
4. Branches: A branch is an independent line of development. By default, your repository has one branch called main (or sometimes master). When you want to work on a new feature or fix a bug, you create a new branch. This keeps your work isolated from the main codebase until it is ready.
Setting Up Git
Before using Git, you need to install it and configure your identity. Git uses your name and email to label every commit you make.
Installation

Initial Configuration
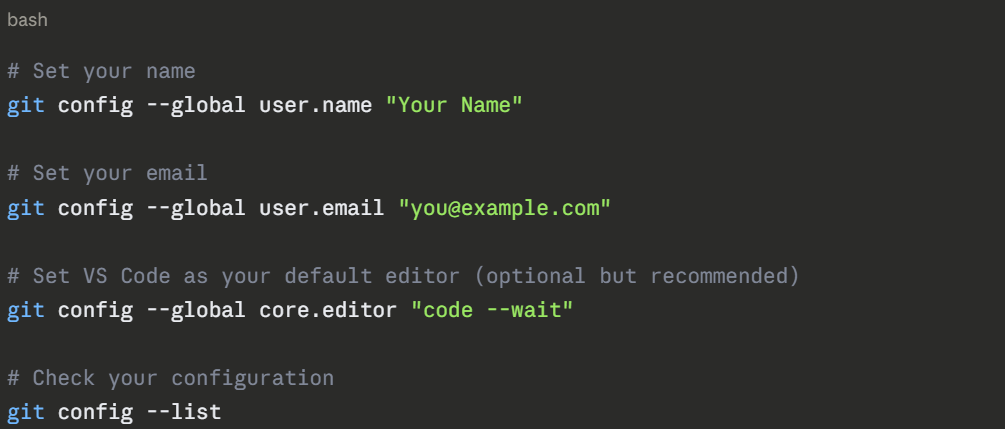
The --global flag means these settings apply to all Git repositories on your machine. You only need to do this once.
The Five Fundamental Commands
Now we get into the commands. These five form the foundation of everything you will do with Git.
Command 1 — git init
Start tracking a project with Git.
git init creates a new Git repository in your current folder. It sets up everything Git needs to start tracking your files.
bash
# Navigate to your project folder
cd my-devops-project
# Initialise a Git repository
git init
```
**What happens:**
Git creates a hidden folder called `.git` inside your project directory. This folder contains all of Git's internal data — the history, configuration, and metadata. You should never manually edit or delete this folder.
**Output you will see:**
```
Initialized empty Git repository in /my-devops-project/.git/
When to use it: Only once, when you are starting a brand new project and want to begin tracking it with Git. If you are working with an existing repository (for example, cloning from GitHub), you do not need git init.
Command 2 — git commit
Save a snapshot of your staged changes to the repository history.
A commit is Git's way of permanently recording a set of changes. Before you commit, you need to stage your changes using git add.
Step 1 — Check what has changed:
 This shows you which files have been modified, which are new, and which are staged and ready to commit.
Step 2 — Stage your changes:
.png)
Step 3 — Commit the staged changes:

The -m flag lets you write your commit message inline. If you leave it out, Git opens your default text editor for you to write the message.
What makes a good commit message
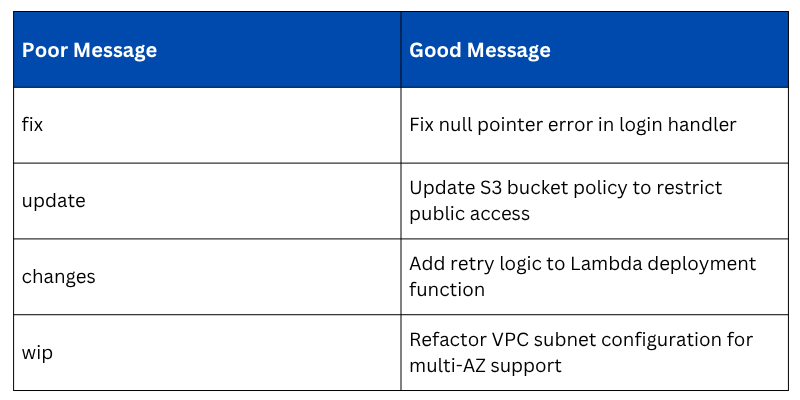
A good commit message is short, specific, and written in the present tense. Future you — and your teammates — will thank you for it.
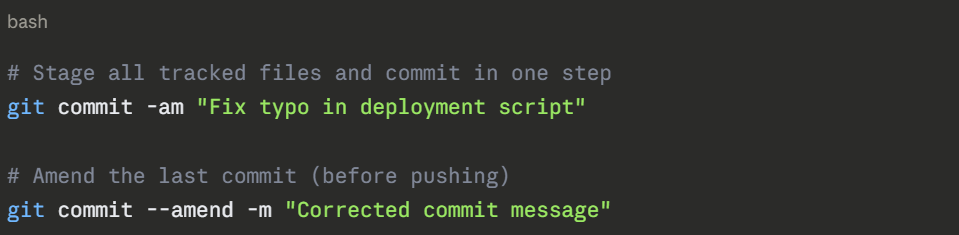
Useful commit options:
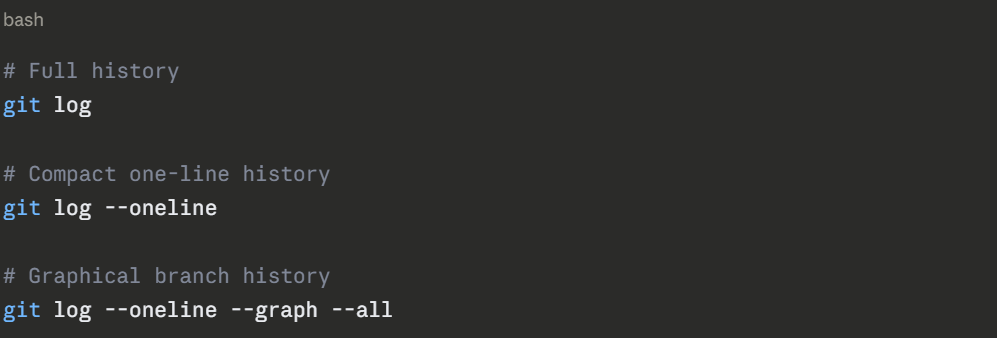
View your commit history:
Command 3 — git push
Upload your local commits to the remote repository.
Once you have committed changes locally, git push sends them to the remote repository. For example, GitHub or AWS CodeCommit — so your teammates can see and access them.

1. origin — the name of the remote repository (this is the default name Git gives to the remote when you clone or add it).
2. main — the branch you are pushing to.
First-time push of a new branch:
.png)
The -u flag sets the upstream — it links your local branch to the remote branch so future pushes can just be git push without specifying origin and branch name every time.
Before you push — always pull first: If other people are working on the same branch, always pull their latest changes before pushing yours. This prevents conflicts and rejected pushes.
.png)
Command 4 — git pull
Download the latest changes from the remote repository and merge them into your local branch.
git pull is how you keep your local repository up to date with what everyone else on the team has been working on.
.png)
You can run these separately if you want more control:
.png)
Pull with rebase (cleaner history):
.png)
This applies your local commits on top of the incoming changes, rather than creating a merge commit. The result is a cleaner, linear history. Many DevOps teams prefer this approach.
Set rebase as the default pull behaviour:
.png)
Command 5 — git merge
Combine the changes from one branch into another.
Merging is how you bring completed work back together. For example, once a feature branch is tested and approved, you merge it into the main branch.
# Switch to the branch you want to merge INTO
git checkout main
# Merge the feature branch into main
git merge feature/add-ci-pipeline
```
### Types of Merges
**Fast-Forward Merge**
This happens when the branch you are merging has no conflicts with the target branch and the target has not moved ahead. Git simply moves the pointer forward.
```
Before: main → A → B
└── feature → C → D
After: main → A → B → C → D
```
Clean and simple. No merge commit created.
**Three-Way Merge**
This happens when both branches have new commits since they diverged. Git creates a new **merge commit** that combines both lines of work.
```
Before: main → A → B → E
└── feature → C → D
After: main → A → B → E → M (M is the merge commit)
└── C → D ┘
Merge Conflicts: Sometimes Git cannot automatically merge two branches because both have changed the same part of the same file in different ways. This is called a merge conflict and you must resolve it manually.
.png)
1. Everything between <<<<<<< HEAD and ======= is what your branch has.
2. Everything between ======= and >>>>>>> is what the incoming branch has.
You edit the file to keep what you want, remove the conflict markers, then stage and commit:
.png)
A Typical Git Workflow
Here is how a DevOps engineer uses these five commands in a typical working day:
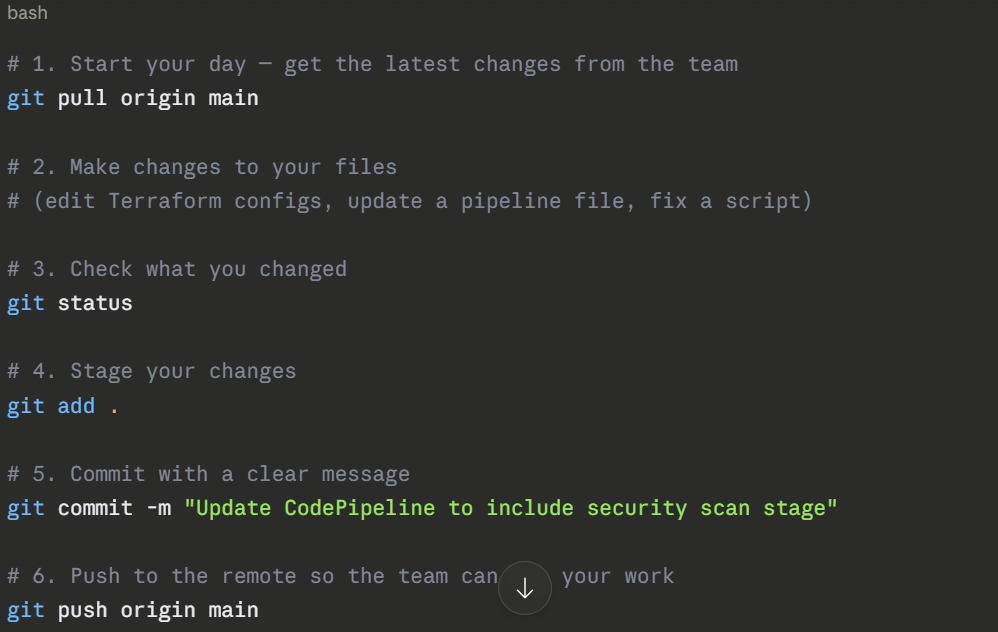
That is the core loop — pull, edit, stage, commit, push. You will do this dozens of times a day.
Other Useful Git Commands to Know
These are not the five fundamentals, but you will use them regularly:

Class Sessions
Sales Campaign

We have a sales campaign on our promoted courses and products. You can purchase 1 products at a discounted price up to 15% discount.